So, if you'd like to see what I created with the brand-new Numbers background stamp, have a look HERE
Showing posts with label stamps. Show all posts
Wednesday, 7 November 2012
New Darkroom Door Stamps
New month, too! And guess who was asked to play with a couple of the beautiful new images? None other than yours truly! I know, how lucky am I !!!
So, if you'd like to see what I created with the brand-new Numbers background stamp, have a look HERE
I also had a play with THIS photo stamp, but you'll have to wait to see those photos : )
So, if you'd like to see what I created with the brand-new Numbers background stamp, have a look HERE
Labels:
Background stamp,
Cards,
Darkroom Door,
heat embossing,
stamps
Monday, 23 July 2012
Stampotique Sentiments...
The current challenge over at the Stampotique challenge blog is to use a sentiment in your project...
I have used this one which goes with quite a few images... I stamped Perl onto a manila tag, next I stamped Floral Flutter & then drew in the edging using a fine Zig pen. The images were coloured in using Derwent Inktense pencils. I also added some cotton seam binding (coloured using some GM) I haven't had much of a chance to play along with any challenges lately, so I'm really happy that I got this tag finished and photographed on time!!!
Thanks for stopping by...
I have used this one which goes with quite a few images... I stamped Perl onto a manila tag, next I stamped Floral Flutter & then drew in the edging using a fine Zig pen. The images were coloured in using Derwent Inktense pencils. I also added some cotton seam binding (coloured using some GM) I haven't had much of a chance to play along with any challenges lately, so I'm really happy that I got this tag finished and photographed on time!!!
Thanks for stopping by...
Sunday, 29 January 2012
With One Set of Stamps
I had a little play with one of my favourite sets of stamps a couple of days ago, and set myself the challenge of creating 3 different looks using the same basic design. I tend to use a lot of colour, so I thought I would do 1 card using some favourite bits and pieces, and 2 cards using colours I don't normally go to... Here are the resulting cards:
I started with this card, using a sheet from THIS pp onto which I satamped the flowers from THIS SET of stamps, as well as THIS RIBBON, and THIS RIBBON. The butterflies were made using THIS PUNCH.
The sentiment, from the same set of stamps, was stamped onto a torn piece of vellum paper using StaZon black ink.
I then moved onto this card, using a dark brown card blank, and a kraft coloured topper, onto which I stamped the same flower images using StaZon timber brown ink, distressing the edges, and adding the image of the dragonfly (hard to see in the photo, but it is there) stamped with Brilliance ink (pearlescent sky blue)
I used THIS DOUBLE-SIDED RIBBON, THIS paper cord, and the cream version of THIS ruffled ribbon (which doesn't seem to be in stock ATM).
And lastly, I made this pink number, again using the same stamped images, StaZon timber brown ink, THIS LACE, THIS RIBBON, and the sentiment was stamped onto a hand-drawn heart and stuck using some foam squares. I added a little KG to the flowers and the edges of the heart, just because I felt like it LOL.
A very basic design can go a long way, just by changing the colours and accesories, much like an outfit : ) Thanks for visiting, I hope you enjoyed your time here...
And don't forget, you still have until the end of the month to enter CRAFT QUEEN's challenge over at CRAFT QUEEN's blog, for all the details, have a look HERE...
Labels:
Cards,
Craft Queen,
Darkroom Door,
lace,
punches,
ribbon,
stamps
Tuesday, 27 September 2011
Hello Sweety...
I had the chance to make a couple of cards this afternoon while watching a Doctor Who DVD with DD, & if you are a Whovian, you will get the reference in my title...
Anyhow, here is my entry for Stampotique's challenge blog, last minute, but at least I made it LOL
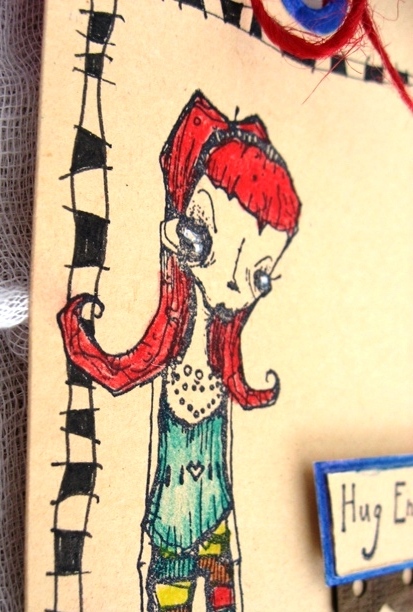
I started with a white card base, doodled in the B&W edge, stamped Miss Snottie (one of my newest purchases, this was her first outing!) onto a piece of scrap white cs & cut out,and as the theme calls for B&W and a hint of colour, I added a painted piece of mesh (I think it's called plasterers tape?) and the sentiment (Carolee's red letter stickers) I used some foam tape for added dimention...I hope the school holidays are being kind to you too : )
Anyhow, here is my entry for Stampotique's challenge blog, last minute, but at least I made it LOL
I started with a white card base, doodled in the B&W edge, stamped Miss Snottie (one of my newest purchases, this was her first outing!) onto a piece of scrap white cs & cut out,and as the theme calls for B&W and a hint of colour, I added a painted piece of mesh (I think it's called plasterers tape?) and the sentiment (Carolee's red letter stickers) I used some foam tape for added dimention...I hope the school holidays are being kind to you too : )
Saturday, 24 September 2011
Hanging By a Bit of Wire...
If you are a jewellery maker, look away now LOL, I think I may have broken some kind of law!
Here is my interpretation of this month's great theme over at Crafty Individuals challenge blog...there's still a couple of days left to join, so if you get the chance, why not give it a go?
I stamped the bodyform from this SET onto some shrink plastic, masking it, and stamping the smaller butterfly from this SET.(I used Archival ink) I coloured the images with wc pencils, then carefully cut around the images, punching a hole with my crop-a-dile, and then, using my trusty heat gun, shrunk the image to a cute little size (I placed the shrunk images next to their original counterparts for reference) I added the shrunk bodyform to some broken bits of jewellery I had picked up at a garage sale, and added that to a piece of suede, stamping onto it using the images from this SET, and adding some KG as a finishing touch. I hope it qualifies for the theme of "hanging about". I hope you're having a great weekend, and if you follow the footy, I hope your team makes it to the finals next week (DH is watching the semis ATM) Thanks for visiting my humble palace, now, go ang get messy : )
Here is my interpretation of this month's great theme over at Crafty Individuals challenge blog...there's still a couple of days left to join, so if you get the chance, why not give it a go?
I stamped the bodyform from this SET onto some shrink plastic, masking it, and stamping the smaller butterfly from this SET.(I used Archival ink) I coloured the images with wc pencils, then carefully cut around the images, punching a hole with my crop-a-dile, and then, using my trusty heat gun, shrunk the image to a cute little size (I placed the shrunk images next to their original counterparts for reference) I added the shrunk bodyform to some broken bits of jewellery I had picked up at a garage sale, and added that to a piece of suede, stamping onto it using the images from this SET, and adding some KG as a finishing touch. I hope it qualifies for the theme of "hanging about". I hope you're having a great weekend, and if you follow the footy, I hope your team makes it to the finals next week (DH is watching the semis ATM) Thanks for visiting my humble palace, now, go ang get messy : )
Saturday, 28 August 2010
A 10 Minute Card? & an Award

Is it possible to make a card in 10 minutes? I have never timed myself when making cards, but this morning I needed a birthday card & I only had a few minutes to spare, so I picked some fun ribbon (from CRAFT QUEEN) a card blank, cut some "Alterations" "on the edge" trim out of some left-over green cs, some white cs (for the quick tag) some chalk (for the edges of the tag) some letter stickers (from HERE), button & left-over ric rac also from CRAFT QUEEN) & my trusty white souffle pen...& 10 minutes later I had my card all done & ready to be mailed!


I then got out a few bits & pieces from my CRAFT QUEEN bag of goodies & made this card...I used a 6"x6" piece of pp, & the die cut was stamped with Darkroom Door French Script in Versamark ink & covered with clear embossing powder, I then went over the edges with Distress ink (Vintage photo)& added THIS button, & THIS lace, as well as the sentiment (from THIS Darkroom Door set)
If you need a great finishing touch for a project, have a look at these beautiful wooden buttons. They are just a few in the range that Nicole has available in her store, & I bet you didn't know she has more than 800 ribbons & 120 ric racs!!!! How do I know that? I just read her blog post HERE
She has also been kind enough to pass on a blog award (thanks, Nicole) & now I need to nominate 10 favourite blogs, & 10 things about me!!!!
Well, my very favourite blogs are already listed on the side bar, so go & do some blog hopping : )
She has also been kind enough to pass on a blog award (thanks, Nicole) & now I need to nominate 10 favourite blogs, & 10 things about me!!!!
Well, my very favourite blogs are already listed on the side bar, so go & do some blog hopping : )
Now, for 10 things about me...that's a bit harder LOL
1. I love to create, anything!
2. I love chocolate, but only if it is Cadbury's Dairy Milk or Dark chocolate.
3. Both DH & DD know I can be bribed with the right chocolate LOL!
4. I love to create, but I very rarely create to a plan LOL
5. I have a terrible fear of spiders!!!!!
6. I love to read books, especially autobiographies.
7. I love horror films, the scarier the better, but I have not been able to bring myself to watch Eight-Legged Freaks (yet)LOL
8. Right now I'm listening to Bustamante's 2005 album "Caricias al Alma" which always reminds me of our trip to Barcelona in 2005 as his single seemed to be playing EVERYWHERE we went : )
9. I wish there were more hours in the day!
10. I love word games (Scrabble, Boggle, & Balderdash are favorites!)
Thanks for visiting my palace, & if you feel like sharing the award, consider it yours, but don't forget to share : )
Labels:
buttons,
Cards,
Craft Queen,
Darkroom Door,
ribbon,
stamps,
Tag
Tuesday, 22 June 2010
It's Up...
My STAMPBORD tutorial is up, have a lookie HERE
My thanks to the lovely people over at STAMPBORD (thanks Lindsey) for inviting me to have a play, & also a big thank you to Rachel (of DARKROOM DOOR) for sending me the new "Fashionable" set to use in this project. I really think DARKROOM DOOR images & STAMPBORD tiles are the perfect mix, don't you?
Friday, 18 June 2010
Happy Birthday to a Friend
Below is a set of ATCs that I'm swapping out, but I just had so much trouble photographing them, what with Melbourne weather the way it has been the last few days, dark, gloomy, & WINDY! Every time I was ready to take the shot one or more would fall... this is the best shot I could take, but they do look great IRL! I've used Non Sequitur, Prima, Time to Stamp, as well as Darkroom Door stamps ( French Script background, & the tiny collage from the Artist set). I hope the recipient likes them :) Now back to your regularly scheduled programme...
Labels:
ATCs,
Cards,
Darkroom Door,
Inkurable Stampers,
Stampbord,
stamps
Wednesday, 13 January 2010
Welcome 2010
CAUTION: LONG POST AHEAD :)
Welcome to a brand new decade, I know I`m a little late updating my blog, but as the old sayng goes, "better late than never".


It`s school holidays here ATM, so not much crafting happening, plus the heat over the last few days has been quite annoying! But enough about the weather :)
DD has been invited to a couple of sleep-over b`day parties, so while she was busy getting her things ready last night, I had the chance to join in this month`s brand new theme over at INKURABLE STAMPERS (where I was lucky enough to win one of the fabulous prizes, for the colour challenge with my party cones , thank you Sarah)
A few months back the theme was "By the Sea" & I made THIS mermaid using a template from THE ENCHANTED GALLERY (a great resource for paperdoll templates!) so I went back & downloaded a different mermaid to make her into a bookmark.
So, here she is, complete with navel jewellery (hard to see, but it`s there LOL)

After tracing all the pieces onto cream coloured cs, I used various images on her arms & torso (by Technique Tuesday & Oxford Impressions), & attached them using tiny brads. I added some beads by sewing them onto her neck as well as onto her wrist. Her "hair" was cut out from a printed book page, & painted with acrylic paint & KG. I like my mermaids to be a bit on the conservative side LOL, so I added a couple of butterflies (Non Sequitor,from my scraps box) to cover her bossom.
Her tail was painted with silver paint, stamped using THIS set of DARKROOM DOOR stamps (part of my prize pack for taking part in DRD Flickr challenge, thank you Rachel) as well as some Victoria`s Secret stamps, using royal purple StaZon ink, & highlighted with a white Souffle pen. I added a little chalk to her arms & her cheeks, & she kind of reminds me of Cher (must be the purple hair LOL) If you look very closely, you`ll see there`s a tiny purple rhinestone where her belly button should be (DD`s idea, thanks darling) She`s approx. 11" long (or should that be 11" tall?) & she will reside happily-ever-after in my currently-being-read book from now on :)


There`s heaps happening over at INKURABLE STAMPERS, including a new prize structure (if you haven`t had a go at the challenges before, this is a great time to take part, as there`s a prize for newbies as well as for domestic AND international entries, so go & check it out HERE And if you`re looking for something a little different there`s also THIS starting this coming Sunday, & I can`t wait to see what the theme will be.
On another note, I also managed to finish my ATCs for THIS swap, but I`ll share when I get my returns back...
& I just got an email from LEESA about THIS competition, so if you have a little time to play, why not join in?
And just what I need to get me scrapping again, this is the prize pack I received on the 24th of December from DARKROOM DOOR, thank you so much Rachel. You`ve heard it from me before, & here it is again: You`ve got to be in it to win it, so go & create something, have fun & play along, & USE that stash, you know you want to!!!!!!
So in conclusion,thank you for reading this far, & Happy New Year/Decade, & as always, thank you for visiting my humble "palace"
Labels:
challenge,
Darkroom Door,
Flickr,
Inkurable Stampers,
stamps
Saturday, 17 October 2009
On a Winning Streak!
Oopps! In all my ATC excitement I forgot to mention that I had also been a winner at INKURABLE STAMPERS last month (for my mermaid), receiving a very generous G/V from Heike at SCRAPZ.BIZ (thanks Sarah & Heike) & I was also lucky enough to receive a very generous cardmakers pack from SCRAPBOOKING TOP 50 (Thanks Victoria) So you see, you have to be in it to win it (says she, who still hasn`t started on this month`s CC challenges over at SBT50!!!!!!!!!!!)
Anyway, I wanted to share the bag I made for this month`s theme at INKURABLE STAMPERS. I had already started it when DD asked me if I was going to show it in my blog, so out came the camera LOL.
I had a bit of trouble trying to find an ink that I could use on fabric, but thanks to Google, I went with Adirondak Dye Ink. I also found lots of free patterns for shoulder bags thanks to Google, complete with great tutorials, but none had the pattern for the style I was after, (a shopping bag) so I worked on the pattern myself, & it turned out just like I had pictured it.
Now, tutorials are not my thing, but I`ll share the photos that I did take & if anyone is interested, I`ll work on a tutorial for later on...just let me know.
I used denim for the outside, & 100% printed cotton for the inside lining. & the finished bag measures 18" x 14" approx. The first 2 photos are the inside bottom corners, it`s what gives the bag its shape.
I then added some short handles, I wanted this bag to replace the ugly but practical shopping bags.
& this is one of the images I used, isn`t it great (this is one of the stamps I chose from SRAPZ.BIZ, thanks Heike)
For stamping on fabric, the image will give great results if stamped onto wrinkle-free, tightly woven fabric, & as you need a hot, dry iron to set the image, cottons work best. Use your DYE inks, & stamp first onto scrap fabric, & when you`re happy with the stamp chosen, stamp onto the fabric, allow a few minutes to dry & then iron on both sides of image without moving the iron about (just press for a few seconds at a time) Now, I doubt that I`ll be washing this bag too often, but if you want to make sure your image can pass the washing test, use a good fabric ink, otherwise, just heat set, & wash gently LOL.
& this is the image I stamped for the opposite side (STAMPOTIQUE from THE STAMPING QUEEN)
& here`s the finished bag : )
& being modelled by my ever helpful DD (thanks darling)
It`s the first time I`ve made a bag, & I`m so happy with how quick & easy it was to make (I know it would have been quicker to make it without the lining, but I was having so much fun sewing FABRIC as opposed to cs LOL, & it looks so much prettier, giving it a nicer finish, don`t you think?). I do believe I`ll be making a couple more as gifts for Christmas (only another 10 weeks away!!!!!!!!)
Who knew stamps could be used on fabric????
Enjoy your weekend, & thanks for visiting : )
Labels:
Bag,
fabric stamping,
Inkurable Stampers,
SBT50,
stamps,
TSQ
Tuesday, 20 January 2009
Are You Puzzled?
Here`s something I`ve had in my stash for a long time, something I just HAD TO HAVE, & yet it`s taken me months to finally use it... It`s a Cuttlebug die in the shape of puzzle pieces. I saw it at the last craft show I went to & I just had to have it, but it took this month`s challenge over at Inkurable Stampers to get me to play with it, I had bought it & promptly forgot I had it (!) 
I got the idea for the "flowers" the other day, remember this? I had to use some wire hangers as I didn`t have any other wire that was thick enough to hold up those big puzzle pieces...I cut, shaped, & colored them using a green Sharpie. The b`ground alphabet is a great stamp from Victoria`s Secret , & I used the same stamp for the lettering. The "leaves " were handcut with a pair of small zigzag scissors from previously painted pages from an old book. I also decorated the tin using the same painted paper, letters & ricrac in purple & red.


Tuesday, 25 November 2008
Lots To Share Part 2
First up, I`m happy to say I`ve caught up with Sandie`s challenges...


Day #6 involved using a star/ stars (I`ve used a Penny Black image as well as a star-shaped brad), day #7 was ric-rac/ribbon (I`ve used an image from an UM red rubber Stamp-It set that I got just this morning from here), Day #8 & the challenge was to use fabric (I`ve used some red fabric as a partial background for another image from the Stamp-It plate, which I heat-embossed with gold EP) & today`s challenge (day #9) was to use wire & beads, so I stamped one of the trees from an AL clear stamp set, embossed it with gold EP, & threaded some wire through strategically placed holes. So there you go Sandie, just for you :) BTW, I had to put a black piece of card behind the cards to be able to scan them, all my base cards were white :)


Day #6 involved using a star/ stars (I`ve used a Penny Black image as well as a star-shaped brad), day #7 was ric-rac/ribbon (I`ve used an image from an UM red rubber Stamp-It set that I got just this morning from here), Day #8 & the challenge was to use fabric (I`ve used some red fabric as a partial background for another image from the Stamp-It plate, which I heat-embossed with gold EP) & today`s challenge (day #9) was to use wire & beads, so I stamped one of the trees from an AL clear stamp set, embossed it with gold EP, & threaded some wire through strategically placed holes. So there you go Sandie, just for you :) BTW, I had to put a black piece of card behind the cards to be able to scan them, all my base cards were white :)
Subscribe to:
Posts (Atom)


