Showing posts with label TSQ. Show all posts

Monday, 17 May 2010

Inkurable Stampers Arch

Here's my entry for Inkurable Stampers Gothic arch #7, with the theme woman/women.
I started by covering my Gothic arch shape with some torn masking tape, & I then gave it a coat of watercolour paint, adding the fabric (a piece of bias binding) by sewing it onto the arch & then cutting into it (only because I miscalculated where I was suppossed to sew, but don't tell anyone LOL)
I then got the Altered Fabric image (Paperartsy from TSQ) & stamped it onto a scrap of white cs, & I did the same with the Woman image (Cherry Pie from TSQ) & trimmed her (sounds a bit rude LOL)
The Create Your Own Reality stamp is by Catslife Press (also from TSQ) & the other 2 stamps I used are both from Darkroom Door. The lace from THIS set was stamped onto an acetate sheet, trimmed & stapled on, & the words Enjoy Life from THIS set were stamped using Brilliance ink & heat embossed using CEP.


As a finishing touch I added the glitter to the top edges, a small paper flower & some leaves from my scraps box. I'm really enjoying doing these arches, but I'm still not sure how I will end up displaying them all...remember you can join in at any time :)

Thursday, 29 October 2009

Christmas Cards

Well, I totally missed SBT50 CC for the month of October, I had all the best intentions in the world, but real life (& other previous commitments) got in the way...but I`m determined to make up for it in the November CC!!!
We (DH & I) have been doing a bit of spring cleaning, or rather, spring CLEARING, changing a few things around the house, & cursing the fact that ALL 3 of us (DH, DD & I) are very keen readers & collectors of books & magazines. But I had to take a break & do something creative, & I remembered that a while back I put my name down to join SANDIE in her 12 Weeks to Christmas competition (you could win some of her beautiful hand-made daisies!!!)...So here are my first 3 Christmas cards for this year, & if you are making your cards this year, you`d better get a move on LOL.
For all 3 cards I stamped my images onto the reverse side of those large Aust.post envelopes, they are white on the outside, & kraft-coloured on the inside, & I have heaps, so I thought I`d re-purpose/recycle/re-use some of them : )
On the first card I`ve stamped the reindeer image (from THIS set from DRD) as well as the word JOY (from the same set) using black Archival ink. The base card is BB, the pp is BoBunny, & the frame is Collections (from TSQ) I used a bit of ribbon, & a Carl punch for the heart. & if you look closely, there`s KG (black opal) added to the tips of the antlers.
For the next card I used the same reindeer image, but in red Stazon ink & some more KG for the antlers. I also got out my Fiskars punch & used it on the pp, & the word is mounted using some foam tape.
& for my final offering, I stamped the image (from PaperForestDesigns) with black ink, & added the words from DRD stamps using some foam tape for added dimention. The pp is from The Green Stack by DCWV (made from 70% recycled paper) So, not only am I making my own Christmas cards, but I`m helping the environment as well : )
Thank you for stopping by, & I hope you`re doing well with your Christmas cards this year : ) & If you get a chance, why not pop in & join SANDIE, you may even win yourself some beautiful flowers : )

Saturday, 17 October 2009

On a Winning Streak!

Oopps! In all my ATC excitement I forgot to mention that I had also been a winner at INKURABLE STAMPERS last month (for my mermaid), receiving a very generous G/V from Heike at SCRAPZ.BIZ (thanks Sarah & Heike) & I was also lucky enough to receive a very generous cardmakers pack from SCRAPBOOKING TOP 50 (Thanks Victoria) So you see, you have to be in it to win it (says she, who still hasn`t started on this month`s CC challenges over at SBT50!!!!!!!!!!!)
Anyway, I wanted to share the bag I made for this month`s theme at INKURABLE STAMPERS. I had already started it when DD asked me if I was going to show it in my blog, so out came the camera LOL.
I had a bit of trouble trying to find an ink that I could use on fabric, but thanks to Google, I went with Adirondak Dye Ink. I also found lots of free patterns for shoulder bags thanks to Google, complete with great tutorials, but none had the pattern for the style I was after, (a shopping bag) so I worked on the pattern myself, & it turned out just like I had pictured it.
Now, tutorials are not my thing, but I`ll share the photos that I did take & if anyone is interested, I`ll work on a tutorial for later on...just let me know.
I used denim for the outside, & 100% printed cotton for the inside lining. & the finished bag measures 18" x 14" approx. The first 2 photos are the inside bottom corners, it`s what gives the bag its shape.
I then added some short handles, I wanted this bag to replace the ugly but practical shopping bags.
& this is one of the images I used, isn`t it great (this is one of the stamps I chose from SRAPZ.BIZ, thanks Heike)
For stamping on fabric, the image will give great results if stamped onto wrinkle-free, tightly woven fabric, & as you need a hot, dry iron to set the image, cottons work best. Use your DYE inks, & stamp first onto scrap fabric, & when you`re happy with the stamp chosen, stamp onto the fabric, allow a few minutes to dry & then iron on both sides of image without moving the iron about (just press for a few seconds at a time) Now, I doubt that I`ll be washing this bag too often, but if you want to make sure your image can pass the washing test, use a good fabric ink, otherwise, just heat set, & wash gently LOL.
& this is the image I stamped for the opposite side (STAMPOTIQUE from THE STAMPING QUEEN)
& here`s the finished bag : )
& being modelled by my ever helpful DD (thanks darling)
It`s the first time I`ve made a bag, & I`m so happy with how quick & easy it was to make (I know it would have been quicker to make it without the lining, but I was having so much fun sewing FABRIC as opposed to cs LOL, & it looks so much prettier, giving it a nicer finish, don`t you think?). I do believe I`ll be making a couple more as gifts for Christmas (only another 10 weeks away!!!!!!!!)
Who knew stamps could be used on fabric????
Enjoy your weekend, & thanks for visiting : )

Monday, 5 October 2009

WCMD

Just in case you hadn`t noticed, this past Saturday, October 3, was the official World Card Making Day, & there`s all sorts of competitions happenning in blogland to celebrate the day! The 2 that I had time to join in with were INKURABLE STAMPERS & DARKROOM DOOR. So here are my cards:

The first card is a heart-shaped gate fold card, made for the INKURABLE STAMPERS WCMD comp. The card measures 10cm X 16cm closed, & 30cm X 16cm open
I started with a BB piece of cs (30 cm X 16 cm) & scored it at 5 cm(mountain fold), 5cm(valley fold),10 cm(valley fold),& 5cm(mountain fold). I then drew, cut & traced the pattern of the heart onto the outside folds, distressing the edges. Using the same pattern, I traced it onto white cs (cutting it a bit smaller), which I then applied GM to in brown & sunflower. I cut the heart in 2 & stuck the 2 halves to the outside folds, stitching them in place. I then stamped the script image (from the DRD Sweet Dreams set) I stamped the dolls stamp(Catslife Press, from TSQ) onto a scrap piece of previously stamped paper (Dancing Spirals Sculpey clay texture sheet/stamp) using Versafine black ink & clear EP( cutting the image in half ) & layered the images onto matching cs, distressing the edges.
The inside of the card has a piece of torn mulberry paper, & the sentiment (Catslife Press from TSQ) was stamped with black ink & clear EP.


& the following are my entries for the DARKROOM DOOR BLOG comp, which had to be uploaded to the FLICKR DRD group:


I just realized that I`m only meant to have one card only (it`s good to take the time to read the details!!!!)

Anyway, here`s the recipe for my cards: A white base card, some torn mulberry paper, some machine sewing, Stamped image from the Viva La Flora Vol 2, using Marvy ink, layered over some red cs, & some more sewing in the corners, with some red ribbon, & the sentiment is from the Full Bloom Vol 1 set


For the second card I used the Venetian Vol 1 image stamped with brown ink & clear embossing powder, & coloured with chalks, & I did a second stamping & put that image onto a square piece of chipboard to give the 3-D look (which can be seen a little better in the close-up photo) The word Explore is from the same set of stamps, stamped onto fabric with black ink, & covered with clear EP.
Lots of texture with the torn cs (but no sewing LOL)


For this next one, I used an image from THIS SET did some bleach stamping, & then overstamped with black ink & clear EP onto some painted cs (using Twinks H2Os) The lilac b`ground is a piece of core`dination card which has been dry-embossed with CB, & sanded back with a sanding block. The word is from THIS word strip.


And this one using the same set, stamped onto a salt & watercolour b`ground (one of my favourite b`grounds)


& for this last one, I swiped a yellow Marvy ink pad directly onto white cd, & then stamped the flower image using Versamark ink & covered with clear EP. I then swiped red Marvy ink over the top & used my fingers to spread the ink around, I so enjoy getting messy LOL.


Well, I sent an email to Rachel apologizing for hogging the Flickr gallery, & I promise to take my time & READ the full instructions before I jump in & start to play : ) Thank you for stopping by, & I hope that by sharing my work I have sparked your interest to get out your supplies & play too. Until next time, stay inky!


Thursday, 1 October 2009

Not So Quick Show`n`Tell...

I have 4 LOs & a few cards to share, all from the SBT50 September CC. I wanted to do more, but there`s only so many hours in the day...Still, I`m more than happy with what I did get finished, & as a plus, DD (who`s almost 12 yo) helped me to choose all the photos! (Don`t forget, you can click on the images to view them in more detail) So here it goes:

Challenge #1, LO had to be 90% white & 10% colour, & had to include a cluster of embellishments. & here`s what I came up with...I know I`m a little biased, but she was a gorgeous baby :)


& here`s a close-up of those beautiful velvet flowers & the felt butterfly gifted to me by Sarah a while back, thank you SARAH :) It`s also the very first time I used that measuring tape stamp (I forgot I had it!!!!!!!)

For bonus points we were asked to create a card with the LO`s left-overs, but as I didn`t have any left-overs, I just kept to the same 90% white/10% colour theme, & used one of my Stampotique kids, & the sentiment is a stamp from Catslife Press (both stamps are from HERE)

Challenge #2 was a sketch, & the technique to use was distressing. We also had to use floral everything, as in floral pps, flowers, etc. This was a toughie for me as I`m not overly fond of flowers on LOs, but I did get to use some of the pps & other bits & pieces from the WIOIN kit I won last month.


& here`s the card I made with the left-overs, the "Thank you" stamp is from a Darkroom Door set.


For challenge #3 I had to use a home-made journal tag, use staples or pins, use a mix of alphas for the title, & I had to have a title AND a subtitle...


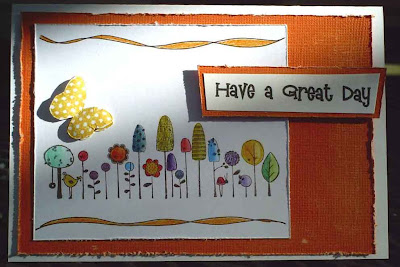
And here`s the card I made with the left-overs, again, the "Happy Birthday" is a stamp from a DRD set, & the spotty butterfly is from a Bella clear stamp set.

For challenge #5 we had to include an animal/insect embellishment, as well as some doodling.


And again, as I didn`t have any left-overs, I used the doodling on my card.
For challenge #6 we had to create a card, which included bright pp, hand-made flowers (I used a Carl punch), a happy sentiment ( "Enjoy Life"stamp from a DRD set) & a charm.
So there you go, all in all, a pretty productive CyberCrop if I say so myself.
While getting all the links to go on this post, Sarah was busy uploading this month`s theme over at INKURABLE STAMPERS, so if you have a few unused stamps that NEED to be played with, go & check out the "BOXES, BAGS & ENVELOPES" post :)
Stay safe, stay healthy, & don`t forget to play...


Monday, 14 September 2009

What a Difference a Day Makes...

I tried to take some photos of my mermaid yesterday, & all I ended up with were blurry pics, & I don`t mean blurry in an arty way, I mean blurry as in BLAH! But today, was a whole different story as you can see:

I got the mermaid template from HERE, & this month`s theme over at INKURABLE STAMPERS was the perfect opportunity to play.
There`s a few templates to choose from too, so if mermaids are not your thing, just click on a plain doll template.
I traced the upper body pieces out of some corrugated cardboard which I cut out & sprayed with denim GM, & stamped the lady`s face (from a Non Sequitur UM stamp plate"The Roaring Twenties") using timber brown Stazon ink. I also stamped the butterfly wings (from Non Sequitur UM stamp plate "House of Belonging") onto cs which I`d watercoloured with Twinks H2Os (mystic blue, ruby red, ginger peach, & mulberry) I then cut out all the wings, shaped them & stuck them to the tail using foam tape for dimention. See that mottled look on her hair, I achieved that look by sprinkling salt onto wet wc paint, allowing it to dry & then brushing off the salt, it`s one of my favourite techniques to use with paint.
As a finishing touch, I stamped & clear embossed the quote from Catslife Press (avail at TSQ)onto a scrap of painted paper, & attached with ds tape. She measures 21 cm in height, & is very shimmery :) I`ll have to find a prominent place for her to hang from, so I can read that quote every day!
Remember, you have until the end of the month to email your entry & join in the fun, & there`s some great prizes to be won, so what better excuse to get out your stamps & have a play???

& If scrapping is your addiction of choice, the September SBT50 CC has already started...how time flies when you`re busy crafting LOL. I`m so glad I finished my "Wonderful World of Books" LO on time (from my previous post), the CC fairy was very good to me last month, & I won a scrap pack from SBT50 & WIOIN, so I`m living proof that you`ve got to be in it to win it ;)

Now I`m off to do a spot of scrapping...thanks for visiting

Friday, 14 August 2009

A Slide Mailer


As promised, here`s my entry to this month`s MUSIC theme over at INKURABLE STAMPERS, using my favourite colour combination of purple & orange (with a few other colours thrown in for good measure!)


I`d never worked with a slide mailer b4 (I received this one as part of a prize pack from Crafty Individuals & INKURABLE STAMPERS), so I had to do a bit of research, & nowhere did I find any actual instructions on how to use the glass! The only tip I`ll give is to use a little window cleaner to make sure there are no finger marks on the glass surface b4 you start work on your project, & I also edged my slides with Stazon ink.
I started by painting the mailer with black acrylic paint, adding some old torn pieces of sheet music (which I found during my clean-up LOL) & when it was all dry, I painted it again with a specialty glaze paint ( Amethyst by MM)
I then edged it with Vivid ink, & added the beautiful sheer ribbons in purple, hot pink & orange (part of my prize from TARISOTA, thanks Tamar, & INKURABLE STAMPERS)
For the actual slides, I stamped the images from one of the DARKROOM DOOR stamp sets (Little Dreams) using Stazon ink (jet black) onto card which I had painted using Twinkling H2Os (in Ginger Peach), then covered the image with some DM, spreading it evenly with my finger & pressed the glass slide on top, & allowed it to dry overnight, trimming the card with a craft knife. (BTW, I think Lyn is onto something! I`ve never cut myself crafting! I just don`t belong in the kitchen, LOL !!!!!!!!!!!!!!!!!!)
I then added some DS tape to the back of the slides, & pressed them into place.
The sentiment is also from the same set of stamps, stamped onto painted card using black Versafine ink & covered with clear EP, stuck onto an inked COLLECTIONS tag (from The Stamping Queen), & attached using some chocolate-coloured cord from a TARISOTA pack :) The butterflies are from a NON SEQUITUR plate (House of Belonging)
I also have another couple of things to share, a card I made for DH`s b`day, as well as his present..

.

I just had to use "Head", an image by STAMPOTIQUE, & added lots of different fabrics for texture(there`s some felt in the b`ground, some linen, felt & hand-sewn beads for the heart & a strip of machine sewn cs) complete with a chipboard crown covered with pewter EP. And the album? It`s full of bits & pieces too, but it`s too personal to bore you all with it LOL. The main thing is that he loved it... :)
And just one more photo b4 I go & make a start on the new DRD Wilderness ATC swap... I never truly realised just how useful my thumb is LOL!!!!


TTFN...& don`t forget to do something creative : )

Tuesday, 21 April 2009

TSQ Giveaway

THE STAMPING QUEEN has a giveaway in her blog HERE, a beautiful set of stamps, & all you have to do to is to leave a comment there & link back to your own blog...

Thursday, 2 April 2009

Two Cards to Share...

Yep, two cards to share, & a layout as well. The first card I made a while back, but forgot to share it here...it was for our wedding anniversary (DHs & mine), it`s hard to see in the scan, but I stamped a COLLECTIONS flourish with red ink & clear EP, the wings were stamped with Stazon ink onto holographic paper, & the cb heart is a COLLECTIONS chipboard shape (which you can get from SAID SIMPLY) painted with acrylic paint, stamped with flourish & covered with DM. I`ve used a bit of scrap watercoloured paper as a b`ground (after taking forever to find a "suitable" bit of pp, I saw this bit just sitting there on my craft table, left-over from a previous project LOL) & I think it looks great, don`t you? I`ve used a rub-on (treasure) which was part of a prize from SBT50...
DD has been away with her school camp this week, so it`s given me extra time to play...The second project is a birthday card made for a good friend of ours (Hi Jason) When I saw this stamp over at TSQ, I knew it would be perfect for his card LOL. I`ve layered 3 diff cs pieces, the bottom one has been dry embossed using a CB folder, & the top one has been stamped with Versafine onyx ink, & heat embossed using clear EP. The letters are a mix of COLLECTIONS ( u r )cb, BELLA (h), & COLLECTIONS letter tiles (o w, OLD)
& lastly, here`s my LO for WEEK 9 of the 45 WEEK CHALLENGE over at SBT50 It`s very hard to tell from the scan, but I`ve used the CB swirl embossing folder on the pp, & have gone over the grooves with DM adding some clear beads to the pp. I also used a BELLA cb corner flourish, which I painted & I added some beads to the voids (try sayng that 3 times in a row LOL) These are two of the last photos DH took of our little Cuddles, before she passed away...I thought I would feel sad doing this LO, but it actually made me feel happy, as this was her favourite pose, with her tongue hanging out, & wanting to lick us :) I hope you`re keeping out of mischief, & are busy creating... & If you get a chance, head over to INKURABLE STAMPERS this weekend, it`s their very first year Birthday, & Sarah has lots of FUN STUFF planned, as well as a new theme for the month...Hmmm, better get busy b4 DD comes back from camp LOL. & as always, thank you for stopping by.

Thursday, 19 March 2009

Say Hello to "Smiley"


I mentioned in the previous post that I had used a stamp from TSQ as an incentive to get ALL the LOs done in the SBT50 CC. & yesterday I got a chance to play with my new toy...so what better way to show him off than in his very own ATC. This also happens to be my entry for this month`s great ALPHABET theme over at INKURABLE STAMPERS, where every month Sarah has some great prizes up for grabs, & all you have to do is follow the set theme. The first image is a scan, but as always, it`s hard to see the dimentional details in a scan, so I`ve also included some photos...He is very cute, don`t you think?


I used my first ever UM alphas, a set that`s been with me for so long, I can`t even remember where I got it from LOL. It is a Leave Memories "Our Baby" UM red rubber plate, which I have mounted onto EZimount & cut up (90+ letters in a mix of UC & LC)
I started off by stamping a random arrangement of the "QUIRKY" letters for the b`ground using the LM stamps, gold ink & gold EP. I then stamped "Smiley" from Stampotique (from TSQ) using Versafine Onyx black ink & clear EP. I then stamped a second "Smiley" onto a scrap of same colour card, using the same technique, & I "painted" his face & hands with bleach, & added highlights with my white Signo pen.
I then stuck him down using DSfoam tape.
For the mounted letters spelling out "QUIRKY" I`ve used my newest alpha purchase, a set from Studio G (series 15) using red, yellow & purple Stazon ink onto fawn coloured BB cs, & his tie is a bow from a Cuttlebug die set (Springtime? I think) & it`s covered with KG.
On a very different note, I just noticed I have two new followers, thank you, it`s nice to know that I`m not just talking to myself LOL. & while I think of it, I haven`t had any comments over HERE : ( I know the photos look big, but they are ATC-sized ATCs LOL, maybe I`ll change the post slightly... Well, if you`ve read through this I thank you for your time & hope you`ll be back, stay inky & CREATE something : )