Showing posts with label Dry embossing. Show all posts

Saturday, 15 September 2012

Did You Know...

There is a giveaway happening at the Craft Queen blog, and I'm told there will be another one happenning next week...Go and have a look, all the information is HERE 
While you're there, don't forget to have a look at all the great new stock that has been uploaded to the site...just click on the NEW PRODUCTS tab and start planning your new projects  : )

In the meantime I will leave you with these photos (washi tape,  tiny twine,   Craft Queen button, Darkroom Door stamps,   Distress ink,  Archival ink,  Double-sided tape,   TH Sizzix embossing folder, TH Reflections stamp,   StaZon ink)


And just in case you missed it, how fun is THIS set of Darkroom Door stamps!!!!


For this ATC I used lots of different Darkroom Door stamps, I used some light blue GM, and stamped various images using Archival ink (coffee)
 My main image is from THIS great new set
and the frame is from another new favourite of mine, THIS one , also by Darkroom Door .

I also added some washi tape as a finishing touch.

Thank you for visiting me at my humble abode, I hope you come back again soon, and don't forget to enter CRAFT QUEEN's giveaway : )


Sunday, 19 August 2012

Hello There...

It's been a while, but today I have a few photos to share...Firstly, a couple of ATCs (Artist Trading Cards)


And a couple of cards made for Craft Queen using a new favourite of mine (and I'm sure I'm not the only one collecting these little spools of goodness), washi tape.


The last photo is just a sneak, as Nicole hasn't shown the card in her blog yet...
I hope you are having a happy Sunday, it's cold and grey here, but great weather for crafting, don't you think?         Now I'm off to finish a couple of ATC swaps, enjoy the rest of your day, and thank you for visiting me : )


Wednesday, 20 July 2011

Embossing Anyone...?

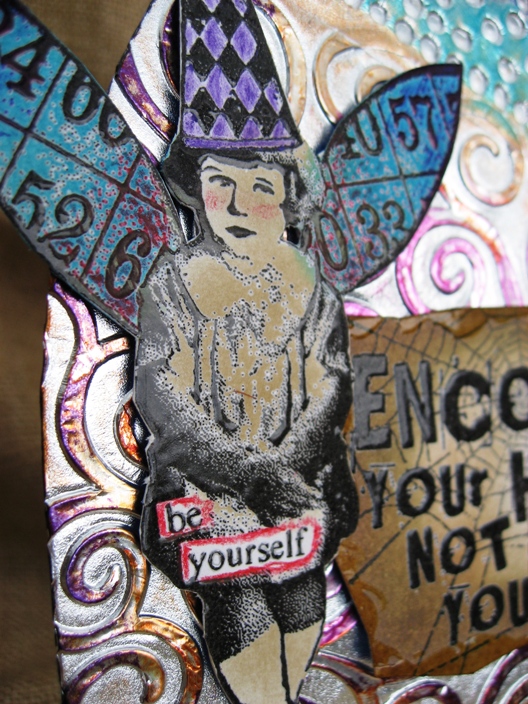
Here is my entry for this week's embossing theme over at Simon Says Stamp and Show blog:


I've once again used a Gothic arch as my base, covering it with foil and using 2 different embossing folders, I then swiped a variety of StaZon ink pads onto the raised and the de-bossed areas, and added the sentiment and the girl image, both heat-embossed, and both from TH (the sentiment was stamped with a web image from the Halloween set of TH stamps)  The images were coloured using a mixture of wc pencils and inks, cut out and stuck on with foam tape for added dimention.   I've kept the arch fairly simple as I really like the texture and colour of the embossing.
Thanks for your visit  : )

Tuesday, 8 March 2011

Say Hi with a Card

Another quick post with a card for Stampotique Challenge blog, using this great "faux barnwood" tutorial from Technique Junkie.      I chose different acrylic paint colours to the ones suggested, but it was fun trying something different, and I do love the crackle effect so I'll definitely be doing it again!!!    

This is the paint just applied.
This is the paint/glue drying, the crackling can be seen.
This is my finished card.
Head holding his heart baloon.

Doesn't the crackling look amazing?!
 Again I'm hoping I make it in time for this great challenge (thank goodness for the time difference!)
For the actual card, I followed the directions in the tutorial, and while my background was drying I stamped "Head" onto glossy cs with timber brown StaZon ink, and coloured him with some Souffle pens.   I added the fence (an Alterations die-cut) and used some foam tape for added dimention.     The chipboard heart was cut free-hand, dry-embossed with a Tim Holtz embossing folder (swirls) painted with red acrylics, and inked with timber brown StaZon ink, and the letters are Carolee's tiny letter stickers.
Thanks for your visit, and see you soon : )

Saturday, 7 August 2010

Twinchies Canvas


Warning...Lots of photos ahead! Last week hubby had his 45th birthday, & this is the present DD & I decided to make for him. It was a project that was meant to be finished during the school holidays, but for various reasons (sleep-overs, family get-togethers, hubby being at home LOL) I was still working on this up until a few hours before DHs birthday, the main thing is that he loved it, & DD enjoyed the process! She did a few of the squares herself (the purple b'ground & gold leaf, the three tiles with the swirly butterfly, the tulip, the maple leaf embedded into the hot glue, the lady with the white gel pen "hair", the brown button on the wax & paint b'ground, the purple heart with the rhinestones, & the little girl with the wings & crown (all her own ideas) 9 out of 36, not too bad, right?). We used many different papers, stamps, chipboard pieces, inks, die cuts, string, rhinestones, glue (& glue gun), shrink plastic, printed words etc.
Initially, we planned on doing a larger canvas (this one is 12"x 12") but we just ran out of time...maybe that's something for hubby's next birthday : ) Other than for the fact that I was stressing out over cutting it soooo close, I really enjoyed playing with the 2"x 2" size. I hope you enjoy the photos. Thanks for visiting, & see you again soon :)