Sunday 31 July 2011

From the Show...


I stocked up on heaps of ds tape, picked up some beautiful papers (Authentique) and other bits and pieces, from CRAFT QUEEN (including some new colours in seam binding, a Martha Stewart butterfly punch, embossing folder, word stickers, Collections printers tray, Kaiser journaling tags, Kaiser tiny letter stickers, and a couple of big wax crayons (great value for doing the crayon resist technique!!!) these were the crayons that Rachel (Darkroom Door) used for her crayon resist demonstrations...and you'll be able to get them from CRAFT QUEEN in a few days.   I'll also be doing a tutorial on using them in CRAFT QUEEN's blog in a couple of days.


I came across lots of great findings for making jewellery, mostly from HERE


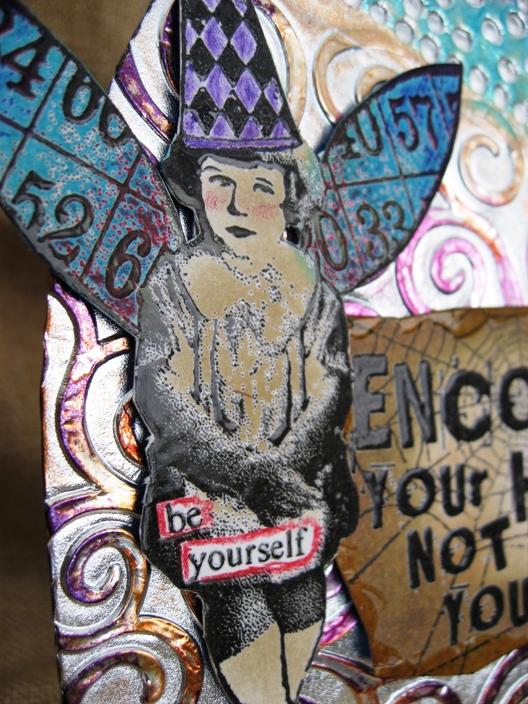
But my favourite find was this great stamp (by Stampabilities) from Dragonfly Crafts, I know it's a mounted stamp, but how could I resist LOL....

Did you get a chance to go?     I made it in Thursday, and I went back for seconds on Saturday (just for a couple of hours)!!!    I love the venue (Melbourne Exhibition Centre, known locally as Jeff's Shed -named after former State Premier Jeff Kennett)   If you did go, I hope you enjoyed it as much as I did, and if not, there's always next time : )   

Friday 29 July 2011

Craft & Quilt Fair in Melbourne 2

Well, if you didn't make it to the show, you probably won't want to read what a fabulous time I had there yesterday...first stop as always was the fabulous Craft Queen stand (F01), where I caught up with lovely Nicole and her equaly lovely mum, Anne, and for once I remembered to take a photo to share...(my camera had a bit of a bumpy wake-up call in the morning, and the screen now has a lovely (!) crack on it, luckily it hasn't affected the actual workings of it)


I was very surprised that it seemed a little quiet first thing in the morning, especially for a first day!   But the flow of crafters seemed steady throughout the day...   I also got the chance to meet and chat with Rachel Greig, who was kept busy demoing her beautiful Darkroom Door products and doing some make'n'takes...It was fun to meet her IRL after watching so many of her great videos


I spent most of the morning taking in some great, and very informative, quilting related talks, and was almost convinced to take up a new hobby (!) until I realised I would have to buy a new lot of extra tools and find accomodation for them in my shrinking craft area, so I think I will just stick to admiring the beautiful quilts I come across in quilting shops : )   I'm sure DD and I can come to some kind of compromise... I also got a chance to meet -very briefly- with my ATC swapping pal Helen (hi, Helen)
If you are in the area, make sure you attend the show, there's lots of information, demos, and a huge amount of inspiration in all kinds of crafts, as well as loads of crafty retail therapy (the best kind LOL)...and who knows, you may even find a new hobby : )

Tuesday 26 July 2011

Craft and Quilt Fair in Melbourne

I'll be going to THIS great craft show Thursday, anyone else going in for some crafty retail therapy?        I'll be catching up with Nicole  (CRAFT QUEEN herself) who will be doing a couple of workshops (check HERE for details, she's doing Workshop 4, and her stand is F01)  but this will be the first time I'll actually be looking at quilt-related stuff...I only found out recently what a "jelly roll" is!(I KNOW, where have I been LOL)     DD would like a hand-made quilt for her bed (of course, what other type is there LOL) so I'll have a look around and see if I'm brave enough to take the plunge, I know there's a reason why I haven't tried my hand at quilting, too much measuring does my head in..something tells me I 'll have to talk her out of a quilt and into a new doona cover, at least until I have done a couple of beginners' classes  : )     Ooh, I just realized Rachel Greig will be there as well...me thinks it's going to be a fun day!!!

Saturday 23 July 2011

Stampotique and Flowers

That's the theme over at Stampotique Designers' Challenge blog for this fortnight, and here is my entry,
an ATC with a shrunk Gibi.    


My base card was covered with an old book page, then painted over with a wash of red acrylic paint, then more paint around the edges and some Distress Stickls.   I added scraps of wc paper and some staples with the tiny attacher, I then stamped Gibi onto shrink plastic, coloured her with wc pencils, trimmed the image with sharp scissors and blasted her with my heat gun.    I then used the 2 smaller sized Alterations flowers, painted them and scrunched them up, added a brad, and some more Distress Stickls, as well as a butterfly punch.   The tiny letters are Kaiser letter stickers.   I hope you are having a fun (and creative) weekend : )   Thanks for visiting me...

Wednesday 20 July 2011

Embossing Anyone...?

Here is my entry for this week's embossing theme over at Simon Says Stamp and Show blog:


I've once again used a Gothic arch as my base, covering it with foil and using 2 different embossing folders, I then swiped a variety of StaZon ink pads onto the raised and the de-bossed areas, and added the sentiment and the girl image, both heat-embossed, and both from TH (the sentiment was stamped with a web image from the Halloween set of TH stamps)  The images were coloured using a mixture of wc pencils and inks, cut out and stuck on with foam tape for added dimention.   I've kept the arch fairly simple as I really like the texture and colour of the embossing.
Thanks for your visit  : )

Time Is Running Out...

You only have until August 31, 2011 to enter STAMPBORD's fun competition...Have a look HERE for all the details and to have a peek at the very generous prizes!!!    You need to have a Flickr account to upload your entry HERE, so what are you waiting for, grab your STAMPBORD tiles and have a play.


If you are new to STAMPBORD tiles, HERE is a tutorial for you (featuring some of the tiles pictured above, all stamped images are from Darkroom Door stamps range) and you will find many more great ways to use STAMPBORD products in their Idea Gallery, as well as in their Featured How-Tos, so make sure you take a look, have a play, and enter, for a chance at winning those fabulous goodies!

Sunday 17 July 2011

For The Love of Books

My lovely DD pointed me to THIS and I have to say, after all the bookstore closures of late, I'm all for spreading the word...I will be adding the code to my blog as soon as I have the time, but I thought it good to share : )     Have a happy Sunday, wherever you happen to be in this Wonderfully Wide World of ours, enjoy your day.

Saturday 16 July 2011

A Ghost in My Paper Palace!

A bit of a departure from the normal goings on in my paper palace...this month the theme over at Alter It Monthly is "Dolls" so I went in search of a doll that I could alter.    My own daughter is now almost 14 years of age, and we've kept some of her toys in storage (I say we, but it's really my DH who is the sentiMENTAL one in our family LOL) but she was never overly into dolls, she had a few Barbies but that's about it, so I made my way to a charity shop and bought a little Bratz doll.


I never liked them much when they first came out (they look a little too tarty IMO) but I thought the dimentions were perfect for what I had in mind : )    So after a good haircut, a few coats of white paint, and a brand new wardrobe, my palace has a ghost!!!


The corset was made by my DD (thanks darling) while the skirt was made by yours truly out of tulle, old book pages, and some interfacing film.        I was going to leave her with the very cropped hair, but then decided she needed some long locks...I think she's a very fitting ghost for my humble palace, what do you think?     DD wants me to do another one, so I guess I'll have to go hunting for more dolls...  As always, don't forget you can click on the photos for a larger view.      I hope your weekend is good to you, and that you get a chance to play with your stash, or at least, have fun planning : )

Thursday 14 July 2011

In Stitches

This week's theme over at Simon Says Stamp and Show is stitches, real or faux...I went with real, as I already had my sewing machine all set up.

I started by stamping the TC image onto white card, once with teal StaZon ink and a second time with rust StaZon ink, I then added some GM to the teal image and stuck it to a brown ATC blank.   I used my trusty sewing machine with a mix of straight and zig-zag stitching all around for the edging.         From the second image, I cut out the sentiment, using some foam tape for added dimention, and a good coat of DM, as well as some KG for some of the teal areas.     A fairly quick ATC, but lots of fun to make.   Thanks for stopping by, and don't forget there's still time to enter the challenge for this week.    For all the details visit Simon Says Stamp and Show, there's always lots of inspiration there, both from the very talented DT, as well as from the entrants to the challenges each week : ) 

Sunday 10 July 2011

Mail Art With Legs...

Or, what to do with your scraps!...join in with the current Stampotique Designers Challenge Blog, of course LOL.     Here's my entry for this fun theme, and I didn't use anything that wasn't already hiding under printed papers, cardstock, and other bits and pieces on my craft table!    Even the envelope was there waiting for me...


I recently took part in an ATC swap for which I used THIS great Stampotique Originals image, but I had the lower body left over as I only used half the image for each of the 9 cards...plus I had 2 full images left over.       I began by sticking the label from the TH Alterations die (which I had used as a mask on another envelope) onto the front of a kraft envelope, I then stuck Smile on top of that, added the other half Smiles to the edges of the envelope, and used a black texta and a mint Souffle pen for the doodling, so easy, but so cute, don't you think?     That's it for me today, I hope you are having a great Sunday : )

Friday 8 July 2011

With a Flourish...

My entry to this week's theme over at Simon Says Stamp and Show is an ATC.


I started by stamping the butterflies onto some white cs, colouring the card with Adirondack inks (lettuce and wild plum)     I then stamped the TH sentiment and the flourish with Versafine black ink and black embossing powder, and added some EP to the edges as well, and rubbed a little white Brilliance ink over the top and stuck the cs to one of these ATC sized chipboard pieces.    I then painted the Collections scroll with black acrylic paint, and gave that a coat of black Stickles.          I love the texture that the embossed flourishes add to the ATC, don't you?      Thanks for your visit, now go and stamp something : )

Crafty Individuals July Entry

A little while ago the lovely Crafty Individuals (Jean and Malcolm) chose THIS as one of five winning entries...and I got to choose my stamp, and they were kind enough to include 2 of THESE little beauties for me to play with...so I thought they were perfect for this month's theme of "pink, cream, and brown"
I started by measuring the inside of the pendants and I cut out a few stamped images to fit, as you can see I couldn't stop at just one...    I was trying to work out a way that I could change the pendants to suit my mood (and trust me, you don't want to know just how many moods I have!!)  when it clicked, I could swap the images around by using some type of magnet, so I had a look through my stash and found some magnet-backed business card blanks, trimmed them to size (one for the inside of the pendant and one for each image, making sure that they "attracted"each other, polarity-wise)     My official entry is, of course, this one, in pink, cream, and brown:

I stamped Old Fashioned Girl onto some pink cs, and clear-embossed the image, adding brown ink to the edges, and a few pearls...

But I also made these ones:  The first image is CI-068 (which may be retired, as I can't find it in the site), stamped onto Distress inks b'ground and with a coat of DM and a sprinkling of tiny rhinestones.
THIS image was stamped onto a prepared domino, overstamped with THIS girl, and given a coat of DM and a tiny flower-shaped rhinestone.

 There's the DANCING couple again, coloured with some Twinks H2Os, and given a coat of DM...and next to that pendant is another image (CI-120 Out of the Shadows) which I've had for a long time, but can't find it in the Crafty Individuals shop, I just stamped the man, cut around him and stuck him to some printed text coloured with Distress ink (Vintage photo).

I had so much fun making these, maybe I'll make a few more ; )
Thanks for visiting me, and don't forget, there's still plenty of time to enter this great challenge, for all the details go HERE.

Thursday 7 July 2011

Just Follow the Instructions...

These were the instructions given to me by my daughter...


...along with a list of colours and a reminder that she wanted me to use a stamped domino : )     At least she knew exactly what she wanted!!
I didn't have the right coloured flowers, but she liked the substitutions I did have, so I then went ahead and completed the card (for her friend's birthday)


My base card is a rich chocolate brown, I then added a light pink card front (distressing the edges) and my final layer was a lovely slightly darker shade of pink which I stamped with THIS Darkroom Door b'ground stamp and some Versacolor brown ink, distressing the edges further so that the lighter pink could be seen.     I then got to work on the rest of the card adding the brown LACE, the light blue LACE, the brown MESH, the pink POM-POM ribbon, the HAPPY BIRTHDAY ribbon, the LARGE paper flower, and the smaller pink paper flower, as well as a Kaiser pearl.       The domino has a coat of red StaZon ink, the Eiffel Tower image is from THIS Darkroom Door set (stamped with Archival ink) and the whole domino front has a coat of clear embossing powder.       The butterflies were made using a punch (the paper was a watercolour and salt background made by DD for a school project, and the colours were perfect for this)       The envelope was stamped with a sentiment from THIS Darkroom Door set, the Monalisa postoid is a Cherrypie image, and the postmark is an old Studio Astarte image.        Daughter was very happy...mission accomplished : )
I hope you are having a great time wherever you happen to be, and if you are in Melbourne, enjoy the rain...

Tuesday 5 July 2011

Repurposed...

Check out my new tutorial over at CRAFT QUEEN blog...
...and let me know what you think  : )

Friday 1 July 2011

Simon Says Stamp and Show a Word...

For this week's challenge over at Simon Says Stamp and Show, the theme is "word" and I chose the word "Imagine".       I was going to make a card, but I wanted a bigger canvas to work with, so decided to do a bit of mail art!    My envelope measures 12"x 9".


I started by stamping the large foam stamp letters using white acrylic paint, then I used Dristressed ink over the top of the letters (the acrylic paint acts as a resist) I then used the label from TH Sizzix die (Hanging Sign) as a mask, and went over that with Distress inks (Vintage photo & tumbled glass)      I also stamped a couple of images from THIS Darkroom Door set, and used one of the gears from another TH Sizzix die (Gadget Gears) as a mask.    I stamped the flourish image from THIS TH set The "mail art" image is from THIS Darkroom Door set, just to make sure my postie doesn't get confused about what this is LOL.     Thanks for stopping by : )