Thursday, 22 March 2012

Easter Cards and a Guessing Competition


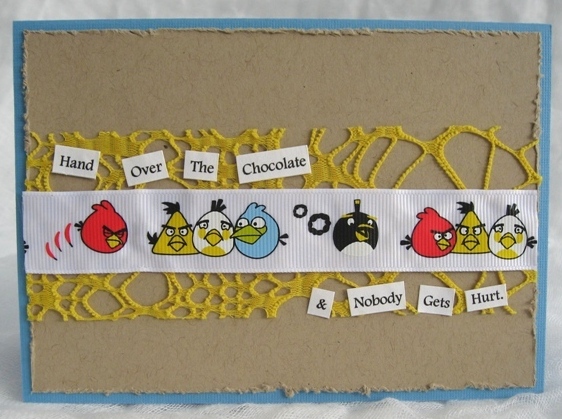
A few cards made using CRAFT QUEEN goodies...

There is a great guessing competition going on at CRAFT QUEEN BLOG, have a look HERE, you have until Friday to guess...

Monday, 5 March 2012

March Right In...

Can anybody tell me what happened to February?   I have a list that's getting bigger by the minute that should have had a few items crossed off by now, but the month just ran away from me!!!!
A new month means a new challenge over at CRAFT QUEEN blog, and this month you have a choice of 2 sketches, one provided by Liz, and the other provided by Petrina.
I've used Liz's sketch for my sample, but I also want to have a go with Petrina's sketch, so that's now going on my "to do" list...stay tuned is all I can say : )

Here is my card:  I used a kraft coloured card base, a die-cut from THIS Kaiser paper pad, THIS mesh ribbon, THIS new crepe ribbon, the sentiment is a stamp from THIS set, and I have also used THIS background stamp on the white cs strips.      The butterflies are punchies made with THIS punch and coated with some KG


For all the details on the new challenge and to see the beautiful samples the rest of the DT members have come up with check out the blog post HERE, and make sure you go over to the CRAFT QUEEN store and see all the gorgeous stock newly arrived HERE.

Thank you for visiting me, I hope to see you again soon...


Friday, 17 February 2012

CASEing

Stampotique's current challenge  (#48) is to CASE one of the DT members, and my DT member of choice is the fabulous Kate Crane.     I got to play with a couple of new stamps for this project (courtesy of Stampotique Original's blog hop last year, thank you Carol)
I used THIS image stamped onto wc paper and coloured with wc pencils, and THIS great sentiment, both stuck using some foam tape for added dimention, plus some bubble wrap, a toilet roll tube (for the big circles), a fairly big brush, plus lots of acrylic paints, and some machine sewing around the edges.    I also added some painted old book pages for the top and bottom edges.    The heart was drawn onto wc paper and coloured in with wc pencils...isn't Hug Monster a cutie!!!


Thanks for visiting, and if you get a chance, there's still a few days to take part in this challenge, for all the details visit the blog HERE : )

Tuesday, 14 February 2012

Happy Valentine's Day

I know, I really should try to spread out my posts more evenly, but I have to strike while the stamps are hot...
Here is a tag I made for my Valentine...Shhhh, don't tell my DH  LOL


I've used an Alterations die to cut my tag, onto which I've stamped a variety of images using Archival ink (jet black).    The cogs, hot air balloon, and the word "adventure" are all from THIS set of Darkroom Door stamps, the heart images are from a Prima clear set, the "ten things I love about you" is from THIS set, and the eyes are from a sheet by Time 2 Stamp.


The letters for YOU are from this Collections sheet of alphas, and the words "are my" were cut out from an old book page.       You can find the tiny red rhinestone stars HERE and the satin seam binding is HERE.      The larger rhinestones (used on the cogs) came out of the Prima pack of stamps.


For the heart (which I stuck to the bottom left hand corner on the reverse of the tag) I used a chipboard shape from a Collections sheet, covered it with texture paste, painted it with brown acrylic paint, and once dry, I rubbed some Brilliance ink (platinum planet) onto the ridges, the heart was then stuck to a piece of torn wc paper painted with Twinkling H2Os.


Thanks for stopping by, and enjoy your day, whatever you may be doing...


Swapping Much?


I've just mailed this month's Darkroom Door ATC swaps (you can find all the details for the current swap HERE) and as usual, I forgot to take a photo of the actual ATC!   But I did remember to take a photo of the Thank You card I included...


I haven't played with Stampbord tiles in a long while, so I went ahead and used one as the centrepiece for this card.
I covered the tile with StaZon ink (teal) and stamped the flower from THIS set of Darkroom Door stamps, and the sentiment from THIS set.   I then used my scratch tool to add the highlights to the images, and then gave the tile a coat of DM for the glossy finish. 


I then used some Distress ink (vintage photo) and the splatter image from THIS set of stamps, and stamped it onto my base card to create the background.
I just love the new WEBBY RIBBONS from CRAFT QUEEN, so I used some of it to anchor the image to the front of the card.    The butterflies were punched out of wc paper and text using THIS punch.

I so enjoy making ATCs and receiving the beautiful returns, it's a great way to share your own creativity, and a fabulous way to see how others use the beautiful images... If you get a chance, why not take part?     Thank you for visiting, I hope you come back soon   : )   

Wednesday, 1 February 2012

A New Month...

And a new challenge over at CRAFT QUEEN's blog...

And these are my samples, 3 very different ATCs (Artist Trading Cards).      I wanted to use the great Crafter's Workshop 6" templates, to show a couple of looks that can be achieved with them.


For this ATC, I started by carefully laying THIS template over some white card, and dabbing some alcohol ink (I used StaZon teal ink) over the pattern.    I then stamped the mesh image from THIS set of stamps using the same ink.      The sentiment from THIS WORD BLOCK was stamped with black ink and stuck using foam squares.       I raided my scraps box and found some corrugated cs, which I dry-brushed with some bronze metallic paint,  and layered that over a piece of punched and watercoloured paper.    I added a yellow button (from a past kit), and a little red wire : )


 For this next one, I started with a white ATC blank, and laying THIS template, I carefully added some texture paste over the top (just like icing a cake) and removed the stencil, cleaning it up (the stencil) straight away.    I allowed the texture paste to dry overnight, and then I painted over the ATC with some blue and some bronze acrylic paints.    I then added the image of the ballerina (stamped onto tissue paper and stuck on with Modge-podge) from THIS set of stamps
The sentiment is from an old Teresa Collins stamp.      You can find the beautiful shell heart HERE, and the leaf HERE.


For the next ATC, I started out with some white cs, and THIS template,  onto which I sprayed a couple of coats of blue Glimmer Mist, allowing it to sit and puddle around the stencil, once dry, I stamped one of the tree images from THIS set of stamps, and trimmed it down to fit inside my beige ATC blank.


I stamped the sentiment (also from the same set of stamps) onto a scrap of vellum paper, adding a little orange coloured TINY TWINE, a square SHELL BUTTON, some butterflies made with THIS punch, and a tiny bit of a sripe ribbon


If you've never made artist trading cards before, they are a great size for using up bits and pieces, plus, you can try out new techniques in a small scale.
And just in case you didn't pick up on it, this month's challenge involves using the word "love", some twine, and a button.        For all the details, and to see the rest of the DT projects, have a look HERE, and don't forget, your entry can be anything crafty, a card, layout, ATC, OTP project, or a sewing project, as long as it incorporates the required criteria.
Thanks for visiting me, I hope I have inspired you to play : )

Sunday, 29 January 2012

With One Set of Stamps

I had a little play with one of my favourite sets of stamps a couple of days ago, and set myself the challenge of creating 3 different looks using the same basic design.    I tend to use a lot of colour, so I thought I would do 1 card using some favourite bits and pieces, and 2 cards using colours I don't normally go to... Here are the resulting cards:


I started with this card, using a sheet from THIS pp onto which I satamped the flowers from THIS SET of stamps, as well as THIS RIBBON, and THIS RIBBON.   The butterflies were made using THIS PUNCH.
The sentiment, from the same set of stamps, was stamped onto a torn piece of vellum paper using StaZon black ink.


I then moved onto this card, using a dark brown card blank, and a kraft coloured topper, onto which I stamped the same flower images using StaZon timber brown ink, distressing the edges, and adding the image of the dragonfly (hard to see in the photo, but it is there) stamped with Brilliance ink (pearlescent sky blue)
I used THIS DOUBLE-SIDED RIBBON, THIS paper cord, and the cream version of THIS ruffled ribbon (which doesn't seem to be in stock ATM).


And lastly, I made this pink number, again using the same stamped images, StaZon timber brown ink, THIS LACE, THIS RIBBON, and the sentiment was stamped onto a hand-drawn heart and stuck using some foam squares.    I added a little KG to the flowers and the edges of the heart, just because I felt like it LOL.


A very basic design can go a long way, just by changing the colours and accesories, much like an outfit : )      Thanks for visiting, I hope you enjoyed your time here...

And don't forget, you still have until the end of the month to enter CRAFT QUEEN's challenge over at CRAFT QUEEN's blog, for all the details, have a look HERE...